Friday, 28 January 2011
GETING CLOSER TO THE FINAL PIECE
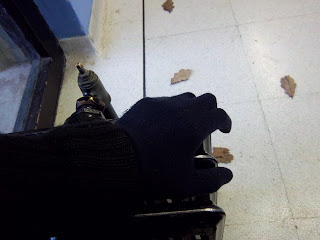
After taking a look a Rinko Kawauchi, I decided I was set on what I wanted to achieve in my final outcome. The two things had in mind where detail and definition. Incorporating rinko kawauchi's methods in my work would further it as I would be focusing on aesthetics as well definition. One other aspect of this photographer that i would like to capture is the fineness of capturing decisive the moment. I thought carefully about how i would compose this whilst sticking to the theme of my hand, from this an oyster card idea sprung into action.
Monday, 24 January 2011
My Photo Essay
My aim is to create a photo essay of things I see every day, related to the theme of frustration. I hope achieve clarity in terms of the scenario and how the viewer mentally interacts with the essay. before achieving this goal I first had to storyboard my photo essay, as is shown in th image on the left.
The shots I decided on where firstly, the establishing shot which was just a bit bigger than a long shot. this would come into a long shot, followed by a high angle shot, followed by an over the shoulder shot ending with a low angle shot.
Once I had my storyboard sorted I decided I would start my photo essay, with the orginal location which was the common room. however, my initial plan changed as i found a more suitable scene location. where frustration was the number one energy flow, this was the art room. the shot itself continued as planed however with the character starting in the frame.
The second shot took a different turn as I decided to have a detail shot whereby the other characters in the frame are captured at eye level, whilst the main character's lower half takes up half of the frame and the scene objective is captured as the paper. this proved much more effective, than the primary idea. as it built the sense of rising emotion following the sense of judgment as the grips the paper vigorously.
For the third shot I found myself taking the photo from a high angle however making the main charcter more inclusive in the frame, this also further establishes the scenario.
For the fourth frame, I stuck to the initial plan, creating a sense of interactivity with the character and his task simultaneously making the task obvious to the viewer.
For the final frame I decided to change the dynamics of the character in terms of how he takes out his frustration. rather than sliding the work on the floor, he would be caught in a decisive moment in which he is about to smack the paper onto the desk. This foretell of event becomes obvious to the viewer via the characters expression and the way in which he is gripping the paper, as though to scrunch it up.
I personally this my photo essay is quite good, as is gets the story across which was my main aim. furthermore, it has a certain sense of suspensive thrill during the mid section.
PHOTO ESSAY/ CAMERA SHOTS
What is a photo essay. this is simply an essay; a term conventionally used to describe a short piece of writing which is quite often written from an author's personal point of view. when used in photography is fairly the same however instead of words there are photos. the photo essay in itself being a set or series of photographs that are intended to tell a story or evoke a series of emotions in the viewer.
A photo essay will often consist of pictures which show deep emotional stages in the story being told. Photo essays can range from purely photographic works to photographs with captions or small notes. or sometimes even full text essays with a few or many accompanying photographs,which in my opinion destroys the whole object of a photo essay. Photo essays can be sequenced, intended to be viewed in a particular order, or they may consist of non-ordered photographs which may be viewed all at once or in an order chosen by the viewer.
When creating a photo essay the camera shots must be taken into account.
-Establishing shot
This shot is very wide. These types of shots tell us where the story will take place, and will most likely establish context, setting and often mood.
-Medium shot
-Medium shot
These type of photos get a little bit closer to the action. usually explaining the story is about and who or what the characters are.
-Detail shot
-Portrait shot
This is usually a head shot, captured in portrait framing. it is often an environmental portrait.
-Moment shot
Otherwise known as the "wow" shot. This photo captures an exchange, a gesture, sometimes even a decisive moment .
-Closer shot
This shot rounds everything up, it can sometimes provides some resolution, or just provides a natural place to end the story in many photo essays. However not in all.
More detailed camera shots and angles:
Camera shots mainly include the "establishing shot"; which is usually and extreme long shot, which allows the viewer to establish the scene, in which the story will take place. a building height equivalent can usually be fitted in the frame.
the "long shot" which introduces a character, this can also be used as an establishing shot on some occasions. in the long shot a character height equivalent usually fits the frame.
the mid shot, is a shot from the waist up which brings the viewer into the conversation or action. the mid shot can varies in name such as two shot or three shot, which is the corresponding amount of characters in the frame viewed from the waist up.
The "medium close up", is a shot from the shoulder area which allows the viewer to get personal with the character, however, not two personal, this then escalates to a "close up".
This usually fits only the characters head in the frame. this shot is used to convey deep emotion, whether it be anger or sorrow. the close up can then escalate to an "extreme close up" which fits one of the characters eyes in the frame, both eyes in some cases. this shot is very effective and creates much more sympathy for the character.
Camera angles include those such as the "birds eye view", this shows a scene from directly overhead, objects viewed from this angle might seem totally unrecognizable at first. This shot does, however, put the audience in a godlike position, looking down on the action.
The "high angle shot" is a shot taken from a high angle, with similar effects to the birds eye view shot, however the shot isn't take directly above and so characters can be recognized, however the viewer is still dominant. in some ways it can be used to portray isolation, making the viewer sympathetic to the character in the frame.
The "low angle shot" is fairly the opposite of the high angle, and is taken from a below the character, causing the character to seem taller, and creates dominance in the character, and renders intimidation in the viewer.
The "eye level shot" is a neutral shot where the aim is purely for the character to be viewed by the audience.
Tuesday, 18 January 2011
Rinko kawauchi
In the following series of images i have incorporated the Rinko Kawauchi ethics. in the photos i hope to have achieved a sense decisiveness, which is in some form aesthetically pleasing. gaking into acount the lighting and the colour and positioning.
Rinko Kawauchi
Rino Kawauchi is a photographer, who captures the simple things that we miss in everyday life, the things we take for granted. She focuses mainly on beauty, and achieves this quality of art to a very high standard. It seems that allot of her photography, are decisive as she capture the moment in which the subject matter is in action.
In this Photo you can clearly tell the fish has just been pulled out from the water. The quality of this picture is outstanding. The colours are very warm which also gives a sense of life as though the fish is still fighting. I personally like this photo, because of the contrast in colour as the the two main colours are orange and blue which complement each other very nicely. This adds vibrancy to the image furthermore showing the contrast to the fish and the outside world.
Below is another photo which is very similar to the other fish photo however, more of the image is in focus. Furthermore the image itself has much more definition and seems more inserting as we can focus on more than one thing at a time. However, having the one fish positioned in the centre of the frame indicates the theme. Which looks like "survival".
Another intriguing thing about this photo is that it has allot of wavy line which further add to the theme as it connotes movement, the abundance in the lines creates rapidity in the movement which was primarily created. With these two images Juxtaposed there a direct contrast. moreover, there is no sense of balance between the two photos as a whole however when placed individually it seem the aesthetics create a dominant balance overlay. This is further portrayed via the positioning of both fish, which is in the centre of the frames.
Tuesday, 11 January 2011
Photoshopping!!!
In the following series of photos I have enhanced and re-created each, one of my photo of the everyday. I chose this photo in particular as it seemed humorous, to add text to such a photo. Further more, it allows the viewer to see the image in a whole new way. This text insanity came from the influence of Jim Goldburg, Barbra Kruger. These two photographers liked to add text to their photos via the person in the photo or rather writing on the photo itself. In these photos I have used photoshop to do varius editing techniques...
...the aim of which I was following in the process of my photo text, was simply to allow the viewer to think differently about the image being displayed. The image I chose as you can see below is poo!-on he pavement. The picture on its own is very clear, however due to the object being displayed the audience is focused on it and, attention is drown away from everything else in the photo. Taking this into account I decided to add text would do the opposite.
Before inserting this text I would have to learn how to add the text. The process was quite simple and straight forward. I started off by geting my picture, then I went on by clicking the text symbol and the moving the cursor across the desktop and then clicking on the destination in which I wished to place the text. After typing in the words I wanted to type in i decided to add effects to make it stand out and look good...
...These included Drop shadow, inner shadow, outer and inner glow, bevel and emboss, gradient overlay, pattern overlay, satin and stoke.
This is the final outcome. The sentence says "the journey can only be fulfilled once one has relieved ones self...
...flush out the bad stuff"
After looking at this master pice I decided i would try again however with a small caption rather the a sentence. I first experimented with the photo this included the brightness in terms of "levels".
I also experimented with the colour as an attempt to make the poo look a little bit more off putting. like a mixture of poo and diarrhea. To do this i experimentd with the hues in order to get a yellow effect. this proved to be very effective.
The only thing missing was the caption. The idea was easy to think of as it came from the picture itself. To do the text however wasn't as simple as the first time, however it wasn't to difficult.
I had to first select the text layer. following this i had to select filter and from this i then selected liquify. and following this was stretching of the text. following this was effects (inner glow, colour overlay, satin).
The second final outcome above! GROSS!
Tuesday, 4 January 2011
The joURNEY hOME
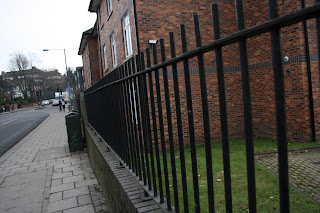
Her are my photos of things that i see every day, in this series of frames i am trying to create a realistic journey. which i take home, highlighting the typical thing i would see.
I found the photo below to be quite spectacular as the detail is quite immaculate, i took the photo of my shoe, as it may not be quite obvious. as you may have realised the background is out of focus. this is a brilliant effect which refers to the journey part of "the journey home".
Monday, 3 January 2011
Edward weston
Checking my success
My images are classified as successful, if they make sense in terms of the theme i described. and whether or not they correspond with my chosen photographer. Though this may not seem clear, my photos do follow the photographers style. I've taken my photographs at a close angle to highlight the main object in the photo. furthermore, i have chosen a background which describes whats happening in the photo. however, having said that, the subject connotations may be quite complex for the viewer to up hold, as there is a broad selection, as to what the over all theme could be. Even so i would say that i was quite successful.
Edward Weston focused on form, and i have done the same. however looking in a more interpretive way. so the image is metaphorical, and in that sense the hand is objectified. this refers to form as the hand is seen as an object which is being used to open a cupboard. by taking the picture close up, the viewer is forced to focus on the hand, and from its surroundings its seen as more than just a hand.
Edward weston
here are some of my photos that i have taken of my hand. in these the photos the theme i was trying to capture was, objectification. where by the hand has become an object which helps us in our everyday lives. helping us do the whashing up, taking out the trash and so on. just like Edward said himself "let it it look like a hand, but let it be something else..." which i have illustrated in these photos. i chose these three pictures to represent my overall theme as they sum it up. use well or use badly, and every tool you use, you wash so it lasts longer. you can view the rest on my flickr page under the names of hand.
Subscribe to:
Posts (Atom)